Installing Mozilla Firefox using Powershell is a quick and easy process. With the following steps, you can have your favourite browser up and running in no time!
1. Open Windows PowerShell as Administrator
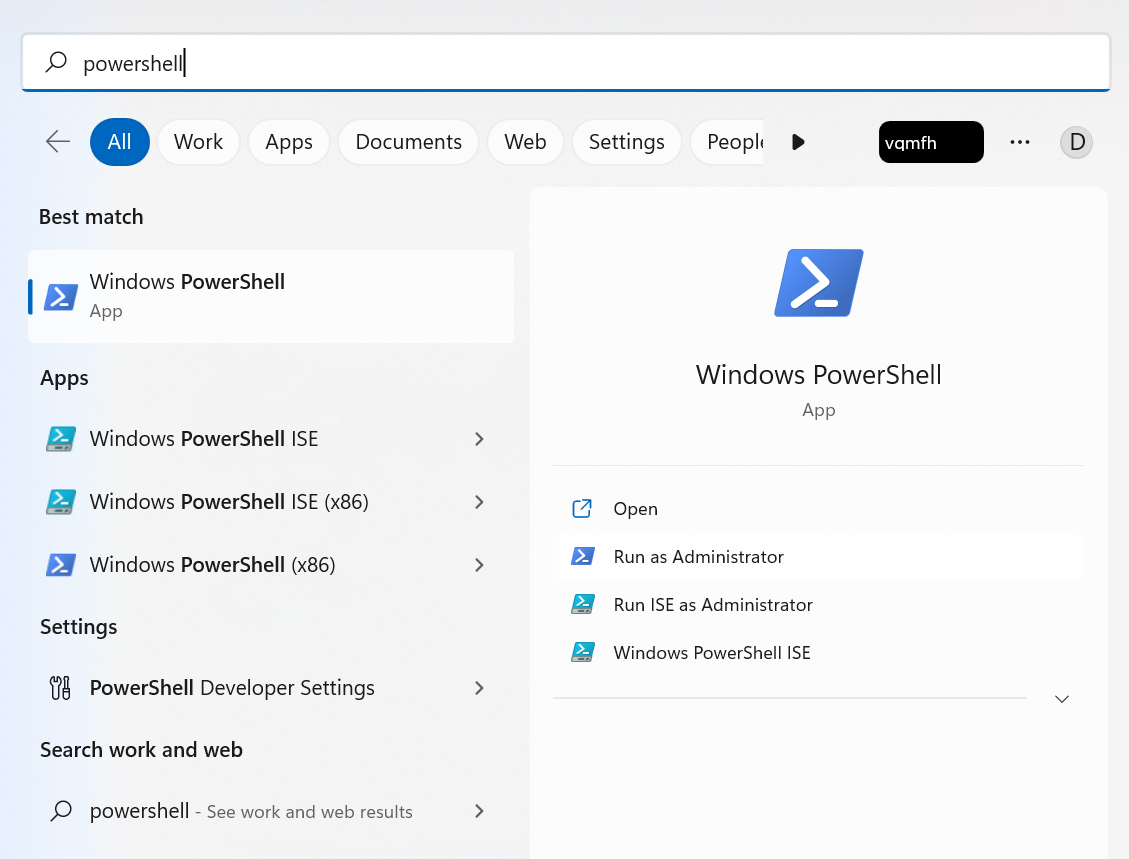
To open as administrator, you need to search for “PowerShell” in the Windows search bar, right-click on it and select “Run as administrator”
2. Run install command
Type in this command to install Firefox:
$workdir = "c:\installer\"

If (Test-Path -Path $workdir -PathType Container)
{ Write-Host "$workdir already exists" -ForegroundColor Red}
ELSE
{ New-Item -Path $workdir  -ItemType directory }

$source = "https://download.mozilla.org/?product=firefox-latest&os=win64&lang=en-US"
$destination = "$workdir\firefox.exe"

if (Get-Command 'Invoke-Webrequest')
{
     Invoke-WebRequest $source -OutFile $destination
}
else
{
    $WebClient = New-Object System.Net.WebClient
    $webclient.DownloadFile($source, $destination)
}

Start-Process -FilePath "$workdir\firefox.exe" -ArgumentList "/S"

Start-Sleep -s 35

rm -Force $workdir/firefox*
3. Wait until the installation finishes
And then, launch Firefox by typing in the following command:
Start-Process -FilePath "C:\Program Files\Mozilla Firefox\firefox.exe"
That's it! You have now successfully installed Mozilla Firefox on your computer using Powershell. Enjoy browsing with your favourite browser!
