Establishing an L2TP/IPSec VPN connection on Windows Server 2019 is easier than you can imagine! Let us guide you through the process of setting up your server quickly and effortlessly. Read on to find out how it's done step-by-step!
1. Install the Routing and Remote Access Service (RRAS) feature using PowerShell:
`Install-WindowsFeature -Name RemoteAccess -IncludeManagementTools`
2. Enable the VPN gateway by running this command in PowerShell:
`Get-RemoteAccess | Set-RemoteAccess -VpnSstp Enabled `
3. Create a new L2TP policy by entering these commands into PowerShell:
`New-VpnSstpConnectionProfile -Name "L2TP-VPN" -ServerVpnType L2TP `
4. Configure the connection profile by running these commands in PowerShell:
`Set-VpnSstpConnectionProfile -AuthenticationMethod Pap,Chap,MSChapv2 -EncryptionLevel Required `
5. Create a local user account by running this command in PowerShell:
`New-LocalUser -Name "username" -Password (ConvertTo-SecureString -AsPlainText "password" -Force) –Description "VPN User"`
6. Assign permissions to the new user account with this command:
`Add-VpnSstpConnectionProfilePermission -User "username" -ConnectionProfileName "L2TP-VPN"`
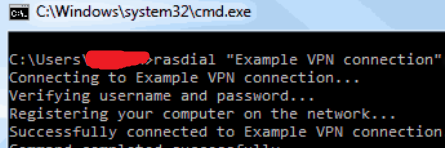
7. Connect to the VPN using this command in PowerShell:
`Rasdial "L2TP-VPN" username password`
You are finished! By configuring L2TP/IPSec on your Windows Server 2019, you have now created a secure connection. Enjoy private browsing.
Note: If you need to adjust the local firewall settings on your server for the new VPN connection, please get in touch with your IT team or system administrator for help. Enjoy surfing! ;-)
