Learn how to enable audio and microphone redirection on a Remote Desktop Server (RDP). Follow this simple guide to configure sound settings in Windows Server and ensure enabled audio input and output during remote sessions.
Step 1: Enable Audio Redirection on the Client (Local PC)
- Open Remote Desktop Connection (mstsc).
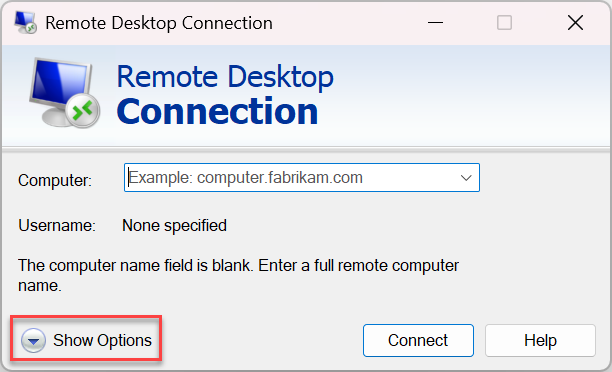
- Click on Show Options > Local Resources tab.
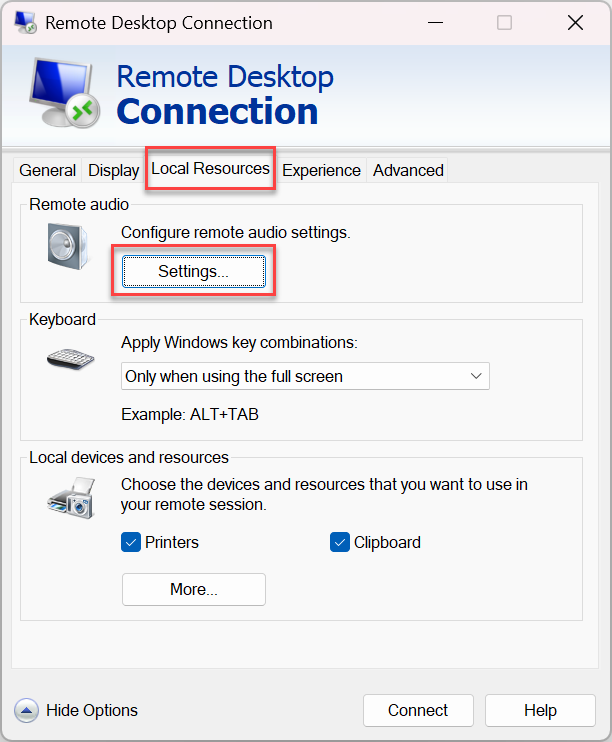
- Under Remote audio, click Settings.
- Select Play on this computer (for output) and Record from this computer (for microphone).
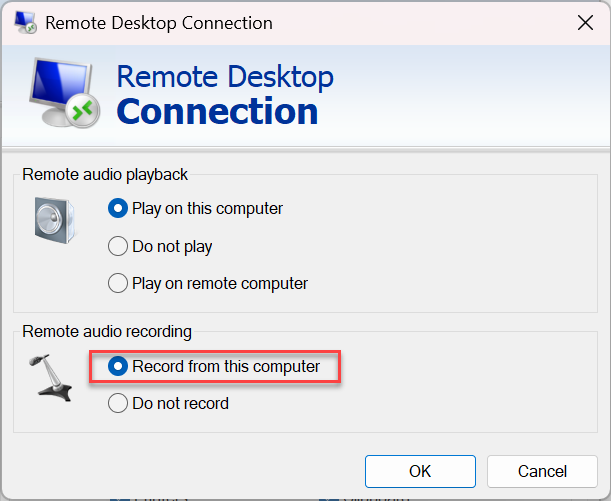
- Click OK, then Connect to the server.
Step 2: Enable Windows Audio Service on the Server
- Connect to the Remote Desktop Server.
- Open Run (
Win + R), typeservices.msc, and press Enter. - Find Windows Audio and Windows Audio Endpoint Builder.
- Right-click each service > Properties > Set Startup type to Automatic.
- Click Apply, then Start.
Step 3: Configure Group Policy for Audio and Microphone (If Needed)
- Open Run (
Win + R), typegpedit.msc, and press Enter. - Navigate to:
Computer Configuration > Administrative Templates > Windows Components > Remote Desktop Services > Remote Desktop Session Host > Device and Resource Redirection. - Double-click Allow audio and video playback redirection > Set to Enabled.
- Double-click Allow audio recording redirection > Set to Enabled.
- Click OK, then close Group Policy Editor.
Step 4: Verify and Test Audio & Microphone
- Restart the Remote Desktop Server.
- Reconnect via Remote Desktop and test the microphone in Sound Settings (
Win + R, typemmsys.cpl). - Try using Voice Recorder or a conferencing app to check if the microphone works.
By following these steps, you can enable sound and microphone functionality on your Remote Desktop Server for a better remote experience.
